Thinking about selling your St. George home and want to get the price and marketing right the first time? You are not alone. In a market that attracts retirees, second‑home buyers, investors, and remote workers, a one‑size‑fits‑all plan rarely wins. In this guide, you will learn how a micro‑market pricing strategy, professional visuals, smart MLS syndication, and a focused 14‑day launch plan work together to help you sell faster and with stronger offers. Let’s dive in.
Micro‑market pricing that reflects your street
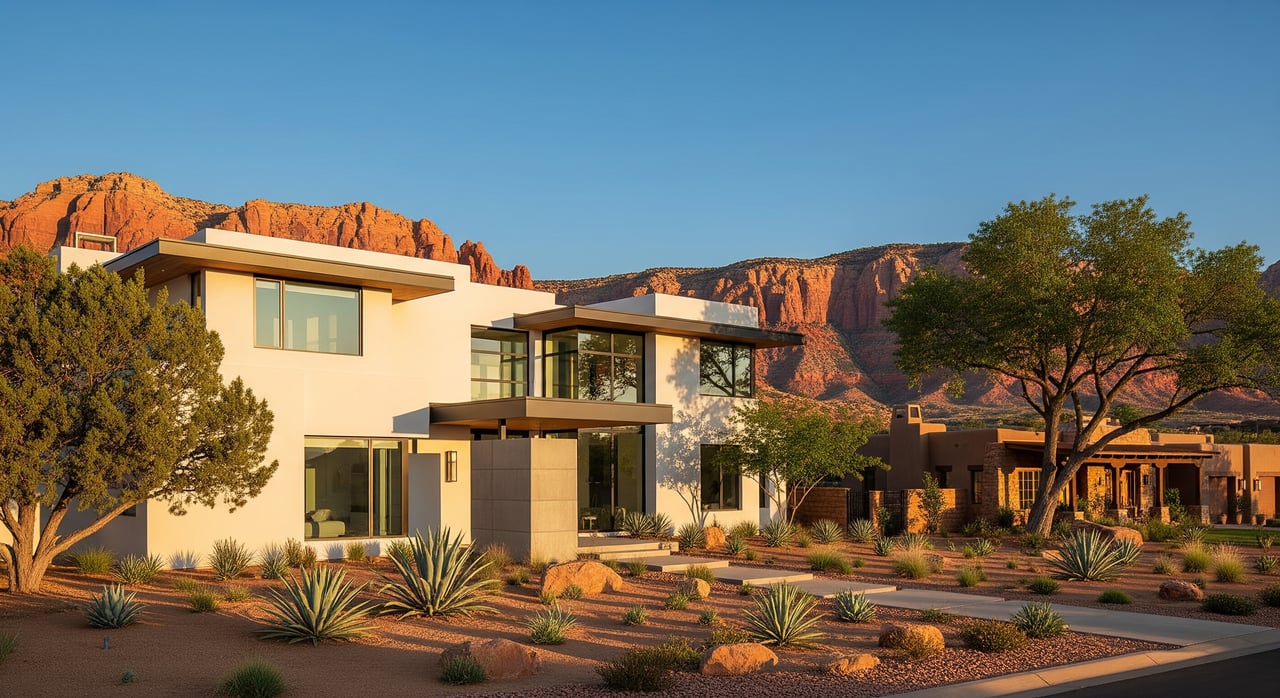
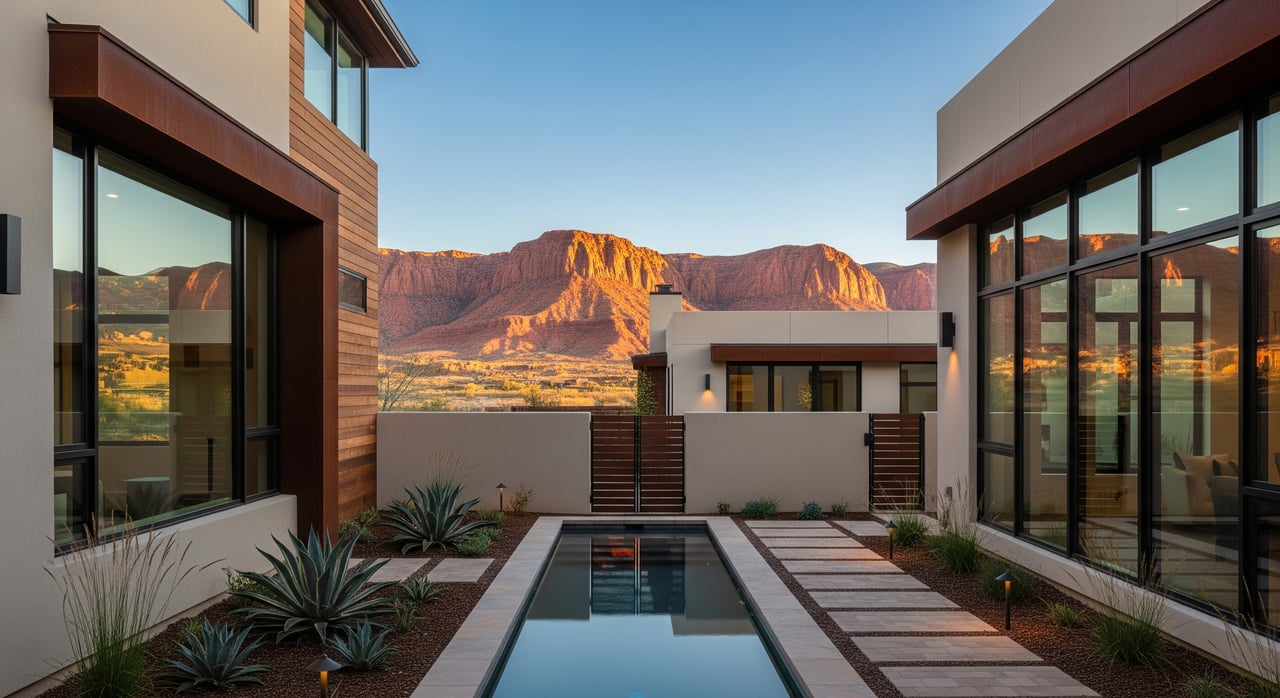
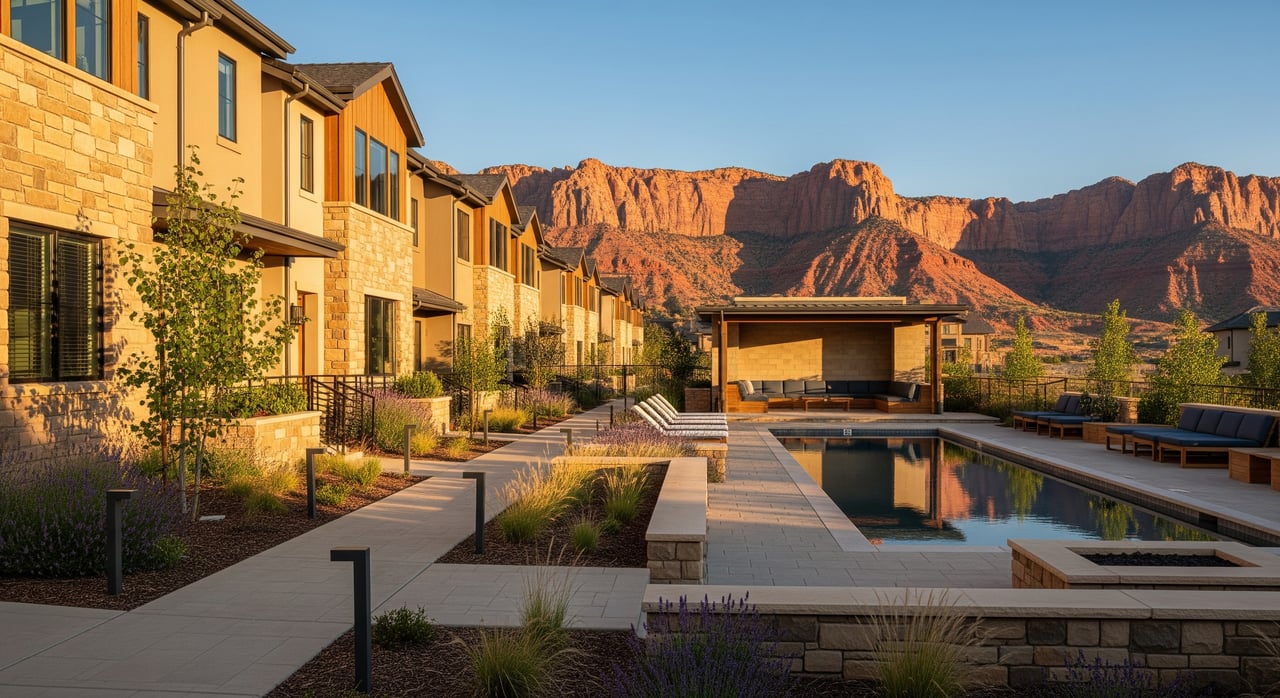
St. George is a collection of micro‑markets. Views, elevation, HOA amenities, and even which side of the street you are on can shift value. A precise price starts with hyper‑local data and a clear picture of who your likely buyer is.
What micro‑market pricing means
Micro‑market pricing focuses on the closest, most relevant comparables. That means:
- Same subdivision, or the same street and adjacent blocks when possible.
- Similar product type, like single‑level patio home, golf course home, or condo.
- Matching lot position and view orientation, including elevation and yard usability.
- Similar condition, upgrades, garage size, and permitted uses, such as short‑term rental zoning.
You also segment by buyer pool. Move‑up buyers, retirees, second‑home buyers, and investors value different features and will react differently to price.
The data your price should include
A defensible pricing conversation should pull together:
- Active, pending, and closed comps from the past 3 to 6 months, with closed sales as the anchor.
- Days on market and list‑to‑sale price ratios for nearby comps.
- Price per square foot bands for your exact floor plan or similar age and condition.
- Adjustments for condition, upgrades, lot size, views, garage capacity, and outdoor living spaces.
- Competition from new construction and any similar active listings.
- Recent local showing and inquiry levels, if available.
Practical pricing strategies
Every home and timeline is different. Here are common approaches to consider:
- Market‑clearing price: Position slightly under direct competition to drive showings fast. Pros: more traffic, potential for multiple offers. Cons: risk of leaving money on the table if demand is very strong.
- Market value price: List at the likely appraised value. Pros: aligns with lender expectations and reduces appraisal risk. Cons: may get fewer initial showings if buyers perceive better value elsewhere.
- Price testing: Start slightly above the target and reduce quickly if showings are weak. Pros: preserves optionality early. Cons: extended time on market can cool momentum.
- Psychological thresholds: Pricing just below round numbers can capture more search filters. Effectiveness depends on the segment and buyer behavior.
- Incentives vs price: Strategic concessions or a home warranty can widen the buyer pool without changing the headline price, but they may affect appraisals and perception.
How your pricing meeting works
To keep you confident and informed, your pricing plan should include:
- 3 to 6 immediate comps, plus a few stretch and lower comps with clear adjustments.
- A snapshot of active competition and any pendings to show demand.
- A recommended price window and a 7 to 14 day plan for launch.
- Fallback options, including staged price adjustments and targeted agent outreach if showings lag.
Pro photos, video, and copy that convert clicks to showings
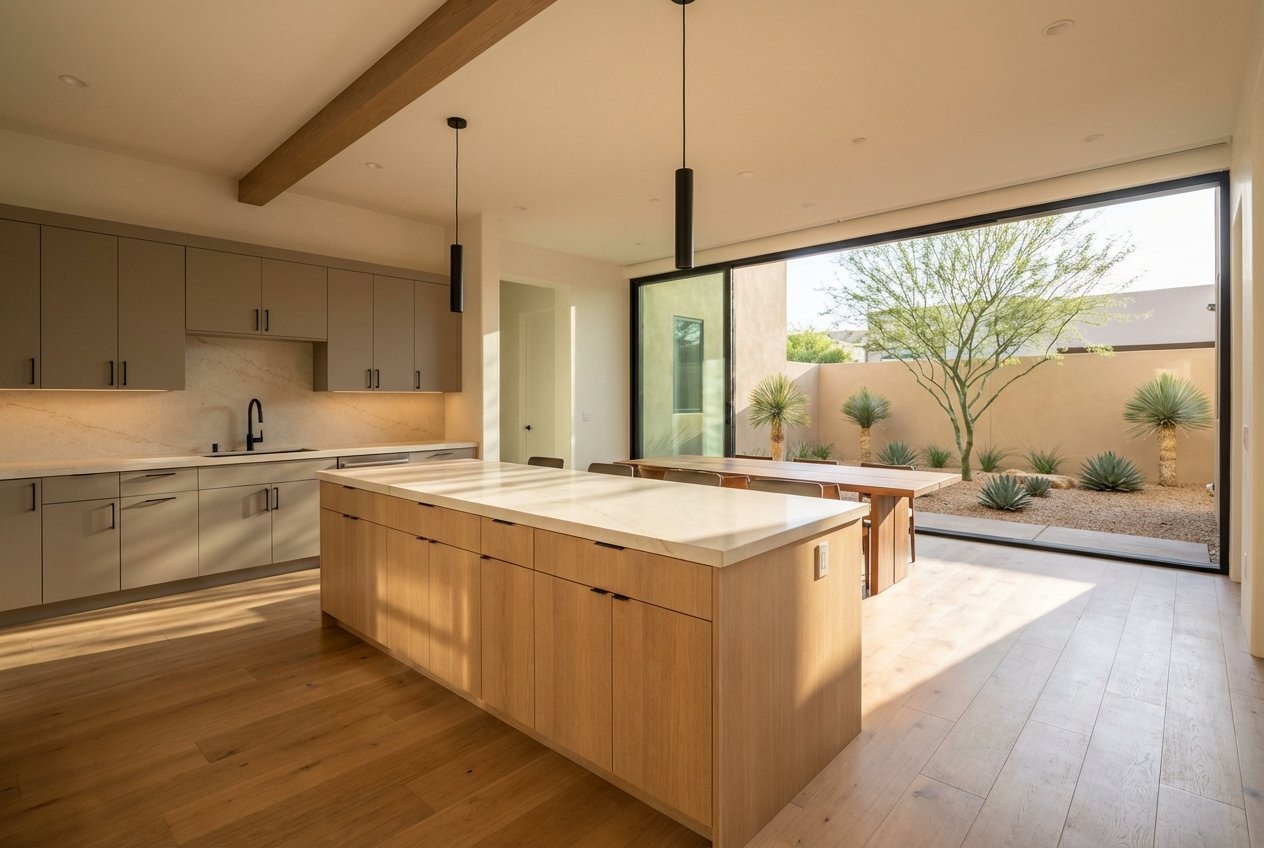
Most buyers start online, and in St. George lifestyle is a big part of the decision. Clean, truthful visuals and focused copy make your home stand out.
Why visuals matter in Southern Utah
High‑quality photography and tours increase clicks, save‑to‑favorites, and showing requests. In a market where views, outdoor living, and low‑maintenance features matter, visuals influence perceived value and how quickly buyers book a tour.
Core marketing asset package
For nearly all listings, plan on:
- Professional still photography, interior and exterior, typically 20 to 40 images.
- Wide‑angle, realistic lenses that avoid distortion.
- A 2‑D floor plan uploaded to the MLS and included in handouts.
- A 3D tour or a guided video walkthrough that is mobile‑friendly.
- A clear, benefits‑driven description highlighting micro‑market features like views, HOA details, and proximity to parks and trails.
High‑value upgrades when they fit
Select upgrades can boost exposure, especially for higher‑end or lifestyle‑driven properties:
- Drone photography and video where permitted.
- A 60 to 180 second property video with neighborhood B‑roll.
- Twilight photography for curb appeal.
- A branded neighborhood map overlay showing access to parks, golf, and downtown St. George.
- Short social reels and ad creatives for platforms where your buyer pool is active.
- A printable one‑page feature sheet for broker tours and open houses.
Staging and prep checklist
Great photos start with smart prep. Use this quick list before your shoot:
- Declutter counters and shelves, and remove personal photos.
- Tidy landscaping, sweep entries, and freshen mulch if needed.
- Replace burnt bulbs, make beds, and open curtains for natural light.
- Handle small cosmetic fixes, like paint touch‑ups or hardware swaps.
- Consider staging: virtual for budget, partial for key rooms, or full staging for higher price tiers.
Messaging by buyer profile
Tailor your copy to likely buyers without excluding anyone.
- Retirees and second‑home buyers: single‑level living, low‑maintenance yards, and access to healthcare.
- Outdoor lifestyle buyers: trail access, parks, golf, and usable outdoor spaces.
- Investors: permitted rental status and, if applicable, rental history and occupancy details.
MLS syndication and showings done right
Strong distribution starts with an accurate MLS listing. Many consumer portals and brokerage sites rely on that data feed.
MLS best practices
- Use the correct regional MLS for Washington County and follow its rules.
- Complete all data fields accurately, including square footage, tax ID, and HOA details.
- Upload all primary media, including photos, floor plan, and virtual tour links.
- Set clear showing instructions and use an approved lockbox.
- Schedule a broker preview and agent‑focused walk‑through where permitted.
Syndication and targeted reach
- Confirm brokerage syndication settings so your photos, copy, and tours display correctly on consumer portals and partner sites.
- For higher‑priced or investor‑oriented listings, consider targeted paid campaigns that lead to a dedicated landing page or the public MLS page.
Coming Soon and agent previews
- Follow local MLS rules on Coming Soon status and any limits on showings.
- With seller consent, schedule a broker tour the day of or day after going live and provide a concise feature sheet.
Showings and the feedback loop
- Use a showing management tool to centralize requests.
- Request feedback from buyer agents after each showing.
- Review trends weekly. High online views and low showings often signal a price or presentation mismatch.
A launch timeline that leverages the first 14 days
Your first 1 to 2 weeks on the market often set the tone for your sale. Plan every step before you go live.
Pre‑listing to go‑live timeline
Week −2 to −1:
- Complete seller disclosures and gather HOA or resale documents.
- Do a pre‑listing walk‑through and knock out minor repairs.
- Schedule staging and professional photo and video.
- Prepare your comparative market analysis and pricing recommendation.
Week −1:
- Finish staging and a deep clean.
- Photo and video day, including drone footage if appropriate.
- Create all marketing materials: feature sheet, MLS remarks, ad creatives, 3D tour, and floor plan.
- Plan the broker preview and open house schedule.
Launch day (Day 0):
- Go live on the MLS at a time that fits your likely buyer’s browsing habits.
- Send an email alert to buyer‑agent contacts and launch any targeted ads.
- Hold a broker preview the same day or next, and schedule your first open house for the weekend.
Days 1 to 7:
- Run open houses and prioritize flexible showing windows.
- Monitor online views, showings, and feedback daily.
- Hold a Day 7 review to decide on any adjustments.
Days 8 to 14:
- Continue agent outreach and refresh ad creatives if needed.
- If demand is strong, review offers and negotiate.
- If showings lag, pivot price or presentation based on the feedback data.
Why the first two weeks matter
Buyer search habits and portal visibility often prioritize new listings. Your initial price, photos, and access all shape the narrative buyers build about your home. Start strong and you keep control of the process.
Metrics that keep you on course
Track these key indicators to stay objective:
- Online impressions and click‑through rate.
- Showings per week and the quality of agent feedback.
- Inquiry count by source, from MLS to ads to direct calls.
- Days on market and list‑to‑sale price ratio.
- Offer count and time to first offer.
- The timing and size of any price adjustments.
If the plan underperforms
Use data to decide the next step:
- High online views, low showings: revisit photos, staging, and the first paragraph of your remarks.
- Many showings, few offers: review pricing, terms, and showing access limits.
- Offers below expectations: prepare tighter appraisal comps and set a clear counter strategy, including concessions or a price pivot.
Local rules and disclosures to prepare early
Staying compliant protects you and speeds up closing. In Utah, sellers typically complete a Seller Property Condition Disclosure. Federal lead‑based paint rules apply to homes built before 1978. If your property involves a septic system, a well, or specific local conditions, confirm city and county requirements and make sure the details are accurate before you list.
If your home is in an HOA, request resale documents and financials early. These often have timelines for delivery. If you plan to market to investors or mention short‑term rental potential, verify the current St. George and Washington County ordinances and disclose whether the property has lawful STR status.
The bottom line
A smart listing in St. George blends street‑level pricing, professional visuals, broad MLS distribution, and a crisp two‑week launch plan. When you align these pieces, you give buyers a clear reason to act and you give yourself better leverage at the negotiating table.
Ready to see how this would look for your property? Get your free home valuation and listing consult with Ciera Huha.
FAQs
How does micro‑market pricing help my St. George sale?
- It uses hyper‑local comps, view orientation, and product type to anchor a price buyers understand, which increases showings and reduces appraisal risk.
What should I include in my listing photos and tours?
- Aim for 20 to 40 professional photos, a 2‑D floor plan, and a 3D tour or video walkthrough, with optional drone and twilight images for standout features.
When is the best time to list in St. George?
- Many segments see more buyer traffic in spring and fall, but the right window depends on your micro‑market and property type, so review comps and seasonality before setting the date.
How do you handle short‑term rental potential in marketing?
- Verify current local STR rules and permitted status, then disclose clearly and highlight rental history if available so buyers can assess value with confidence.
What happens if my listing gets views but few showings?
- This often points to a presentation or messaging issue, so refine photos, staging, and remarks first, then reassess price if needed at the Day 7 review.
What do I need to do before going live on the MLS?
- Complete disclosures, gather HOA documents, finish staging and minor repairs, capture professional media, and verify all MLS data fields and media links.